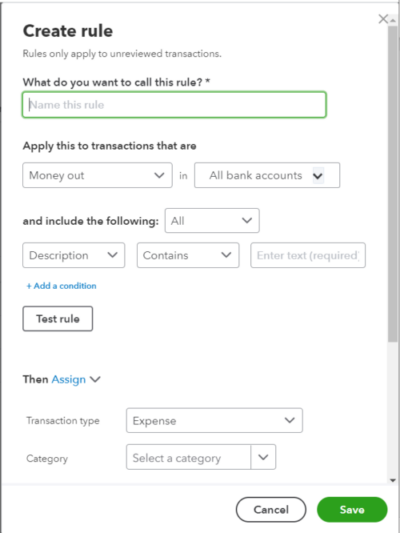
Let’s walk through the steps using Amazon as an example.
1. From the Banking page, select the Rules tab.
2. Click on the “New rule” button.
3. Enter a name for your rule that helps you identify it easily.
At Frankly Bookkeeping, we like to keep things simple, so we will call it Amazon.
4. Select the bank account or accounts to which the rule will apply.
Since Amazon is typically something we pay for, we will choose Money Out of all bank accounts, or you can select a specific bank account.

5. Choose the transaction type you want to apply the rule towards, such as “Expense” or “Deposit.”
6. Set the conditions for the rule.
What we want this rule to do is if QBO sees the word “Amazon” in the bank description,
we want it to choose a certain transaction type and category. Additionally, you can add another condition, such as if the amount is less than $100
7. Choose the category that you want the transaction to be assigned to. For our example, we will choose “Office Supplies.”
8. If you want to add a payee, you can do so by selecting “Add” next to the payee field. For our example, we will enter “Amazon.”
9. Set any additional conditions, such as the amount or the date range.
10. Check the box next to “Automatically apply this rule” if you want QBO to automatically apply the rule without your review.
This is a great time-saving feature if you frequent the same establishments for the same purposes.
11. Click on the “Save” button.

Copyright 2023 Frankly Bookkeeping | Terms of Service | Privacy Policy | Disclaimer | Site Map